
What wearable fashion sellers need at a market stall
Clothing and accessories sell best when people can see the shape, colour and finish without fighting through piled stock. At weekend markets in Hatfield, Brooklyn or Menlyn, shoppers often stop for a quick look first, so your setup needs to read clearly from a few metres away. Rail-based displays suit this well because they keep garments visible, sorted by size or style, and off the floor where dust, foot traffic and damp weather can cause trouble.
For local apparel makers, wearable art sellers and accessory traders, the aim is simple: make it easy to browse, easy to pick up, and easy to pay. That means a strong hanging system, a few display tables for folded pieces and a small mirror or fitting spot where possible. In Pretoria's drier winter and summer storm season, your stock also needs cover and fast packing so you can move quickly if rain hits.
Typical rail and display equipment for apparel stalls
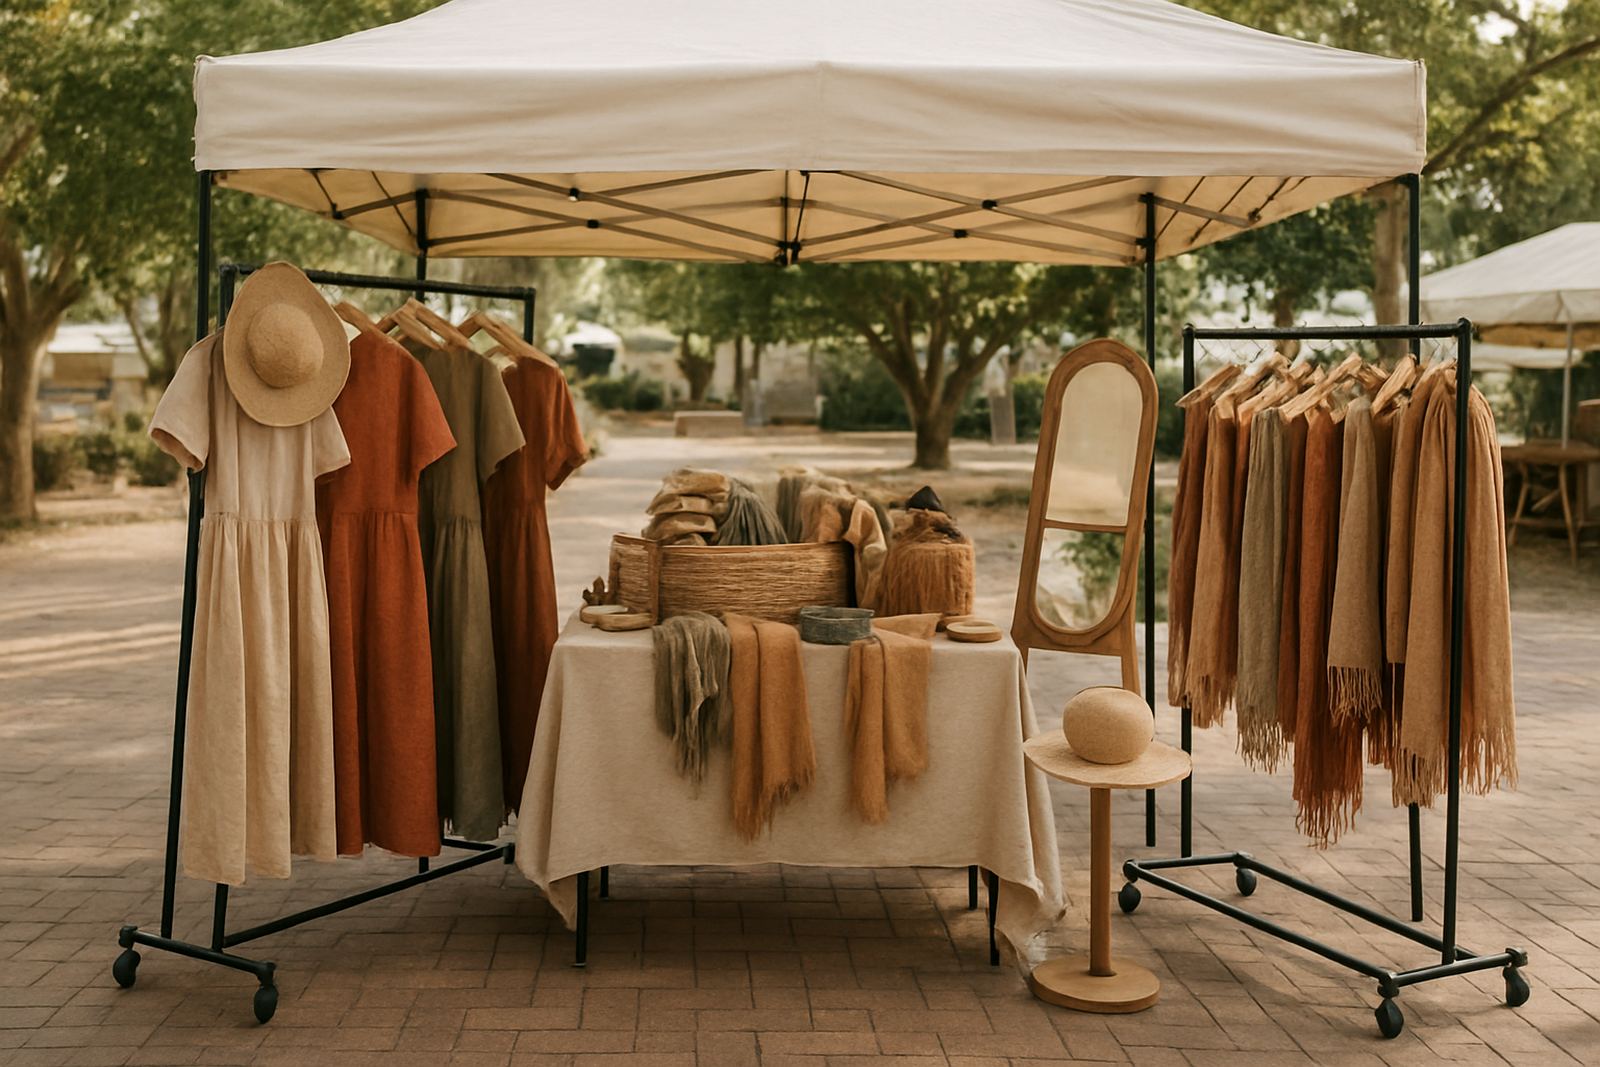
A solid wearable fashion stall usually starts with one or two garment rails, then adds folding tables, hooks, baskets and display stands for smaller items. If you sell scarves, hats, jewellery or bags alongside clothing, keep those items separate so the stall does not look cluttered. A simple layout often outperforms a full table crammed with product, specially at busy maker nights where people are passing through in groups.
- 1 or 2 heavy duty garment rails with castors for easy movement
- Folding table for folded clothing, packaging and payment
- Hangers in matching style and colour for a cleaner look
- Mirror for hats, jackets, wraps or jewellery try-ons
- Baskets, crates or risers for accessories and folded stock
- Tablecloths or back panels in neutral colours to frame the product
If you work with delicate wearable art or hand finished pieces, add garment bags or dust covers for backup stock. Coastal humidity in pop-up towns can affect some fabrics and packaging, so breathable storage is better than sealed plastic for every item. A good rail setup should let you restock fast without unpacking the whole stall.
How to plan the stall layout for better browsing
Start with one clear front line. The front rail or first display should show your strongest pieces at eye level, while lower stock can sit on shelves or folded stacks beneath. Leave a narrow aisle inside the stall so one person can move behind the display while another serves customers. If the space is tight, keep your payment point near the exit side and not in the middle, because people hate feeling blocked in.
Use height to your favour. A back rail at a slightly higher level helps long garments hang properly, while a second lower rail can carry shorter items like tops, kidswear or bags. For markets in Centurion or Lynnwood where family shoppers may come in with prams, avoid wide stands that stick out into walkways. Better to keep the stall neat and open than to squeeze in too much stock. Small changes in spacing can make the stand feel calmer and easier to shop.
Common mistakes wearable fashion sellers make
The biggest mistake is overfilling the rail. Clothes need air and spacing to look worth the price, and when everything is bunched together it is hard for customers to see fabric, fit or detail. Another common problem is mixing too many product types in one zone. Jewellery, clothing and bags can work together, but each one should have its own place or the stall loses focus.
Other issues show up once trading starts. Weak rails can sway on uneven ground. Light-coloured stock can pick up dust. Long hems drag in wind. And if you are selling at an evening maker night, poor lighting can hide stitching or print detail. Small mistakes, like forgetting spare hangers or not labelling sizes clearly, slow down sales and make the stall feel less organised.
- Do not hang every item too tightly together
- Do not use mixed hanger styles if you want a clean finish
- Do not leave size labels hidden inside garments
- Do not rely on a single rail for all stock
- Do not ignore wind, dust or sudden rain at outdoor events
Budget ranges in Rand for a rail-based fashion stall
For a small first setup, many makers can get going with about R2 500 to R6 000 if they already have some stock and a few basics like hangers or table covers. That usually covers one rail, a folding table, display baskets and a mirror. If you need better quality rails, branded signage, matching hangers and more polished display pieces, budget around R6 500 to R15 000. Sellers with full clothing ranges, repeat pop-up dates and workshop stock may spend R15 000 to R35 000 or more over time as they add cases, lighting and transport gear.
Your budget should also include replacement items. Hangers bend, rails wear out and packaging gets used up fast. If you trade often in Pretoria, Johannesburg or at nationwide events, it is wise to keep a small monthly reserve for upkeep. A neat stall does not need to be expensive, but it does need parts that hold together through repeated packing and unpacking.
Planning around market conditions and customer flow
Weekend markets in Hatfield and across Pretoria often draw shoppers who want quick choices and easy parking, while maker nights bring a more social crowd that lingers longer. That affects how you use your rail displays. For daytime trading, front-facing rails and clear size sorting help speed up browsing. For evening events, add better lighting and a few styled looks on mannequins or torso forms so customers can picture how the piece wears.
Keep backup power ready if your stall depends on lights or card payment devices, and make sure your display still works in dimmer conditions. A well planned rail stall should stand on its own even without full venue lighting. When the setup is practical, customers spend more time looking at the product and less time waiting for the seller to untangle stock or fix a wobbly rail.